3D Tutorial - Step 21 - Creating a Navigation Mesh
by Monstrous Software
Step 21 - NAVMESH generation
In step 19 we introduced the navigation mesh which we use to control where the NPC’s (non-player cooks) are allowed to move to in their efforts to catch you.
In that part of the tutorial, we created the navmesh by hand in Blender, which requires some Blender skills and would have to be redone in case of level design.
There exist tools that can generate a navigation mesh automatically. A well-known library that does this is Recast which is used AAA games and by well-known game engines.
JamesTKhan has developed a library called gdx-recast for gdx to work with Recastj, which is a java port of Recast.
However, there is also another, perhaps easier, way to build your navmesh through an on-line version of Recast which can be found here https://navmesh.isaacmason.com/. You can drag and drop your game level as a GLTF file and it can export a navmesh as another GLTF file.
This is very handy if we may assume your game level is static so that we can build the nav mesh ahead of time.
First we will prepare a GLTF file as input from the original Blender file (step21.blend)
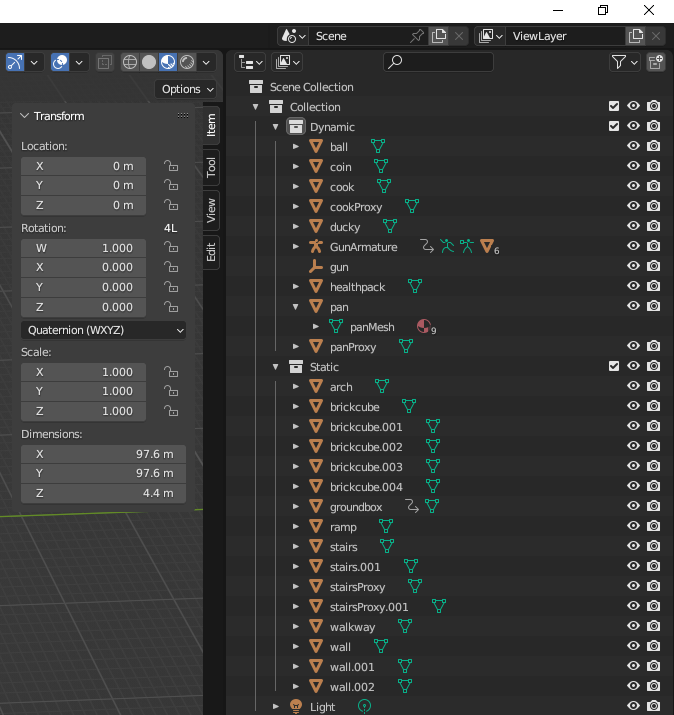
It helps to disinguish between static objects which we consider to be part of the game level (walls, ramps, the ground, etc.) and dynamic objects which will be moving or be scattered around the level (characters, coins, health packs, etc.). For this we create two “collections” in Blender’s outliner one called Static and one called Dynamic and we drag each object into one of these collections.
Now select all the objects in the Static collection and export these to a GLTF file (File/Export/glTF 2.0). Use a glTF embedded file, the glTF Separate format is not supported by the online tool. Make sure all selected objects are included. Give the exported file a name such as step21-static.gltf.
If we go to Isaac Mason’s web site https://navmesh.isaacmason.com/ it invites us to drag and drop a GLTF file. If we didn’t make any mistakes we should then see the game level in the browser.
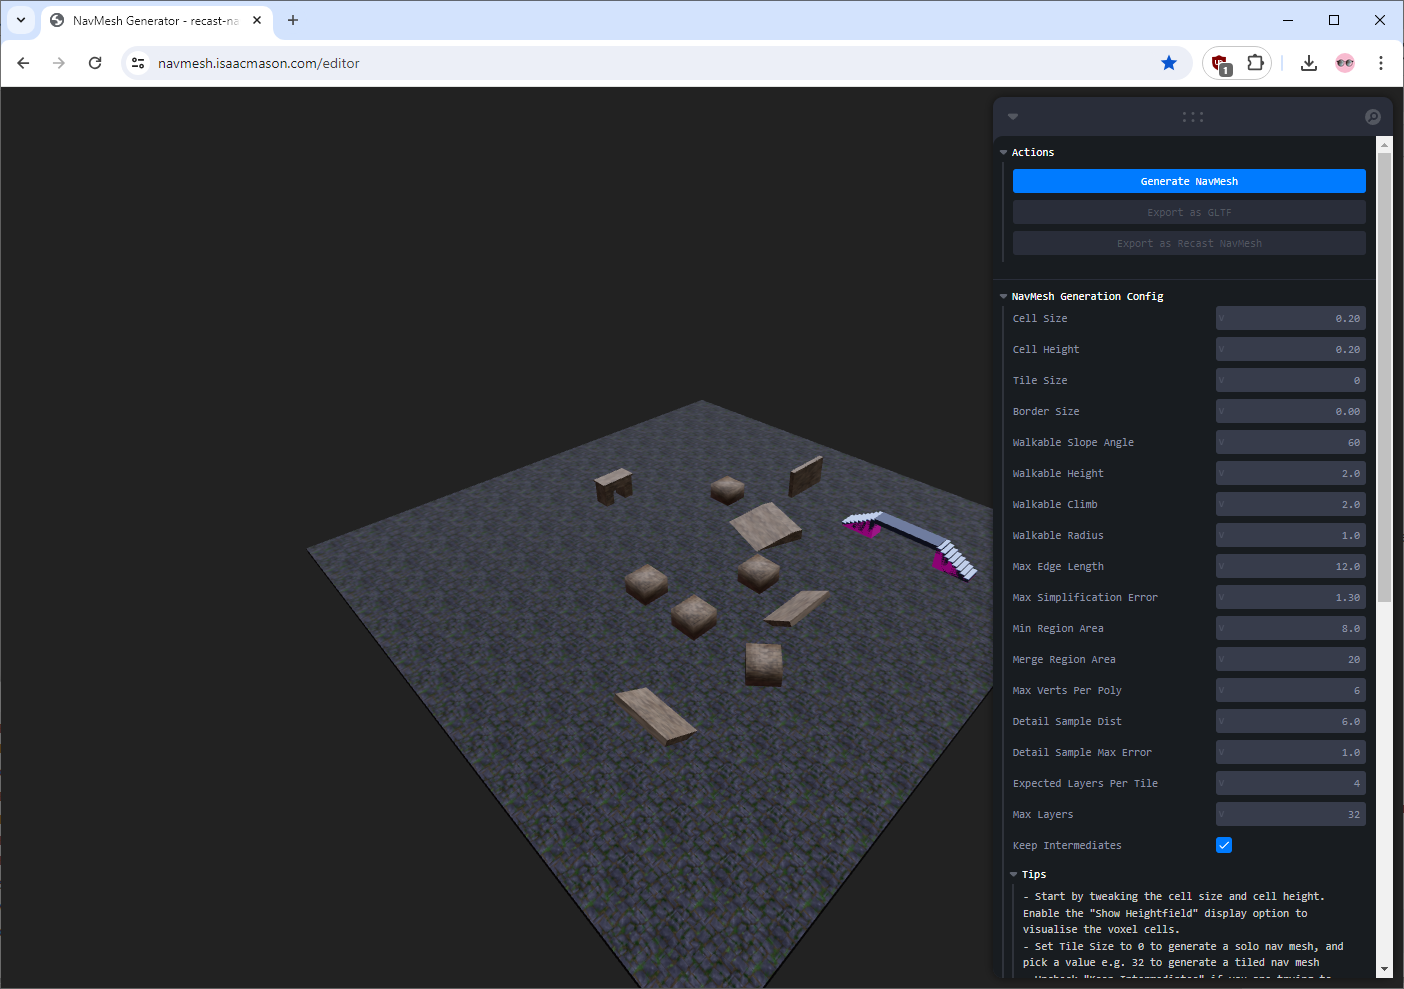
We can then tweak the parameters in the edit fields and press the Generate NavMesh button. You can read the Recast documentation to find out more about what these parameters do. These settings affect the quality of the navmesh. Look carefully if all areas are reachable.
For the example level, I found good results by changing the following parameters:
- cell size to 0.4
- cell height to 0.4
- walkable radius to 2
Make sure the path over the bridge is connected at both sides and that there are no navmesh squares placed on top of the blocks. You can use the checkbox to hide the original model to better see the navmesh.
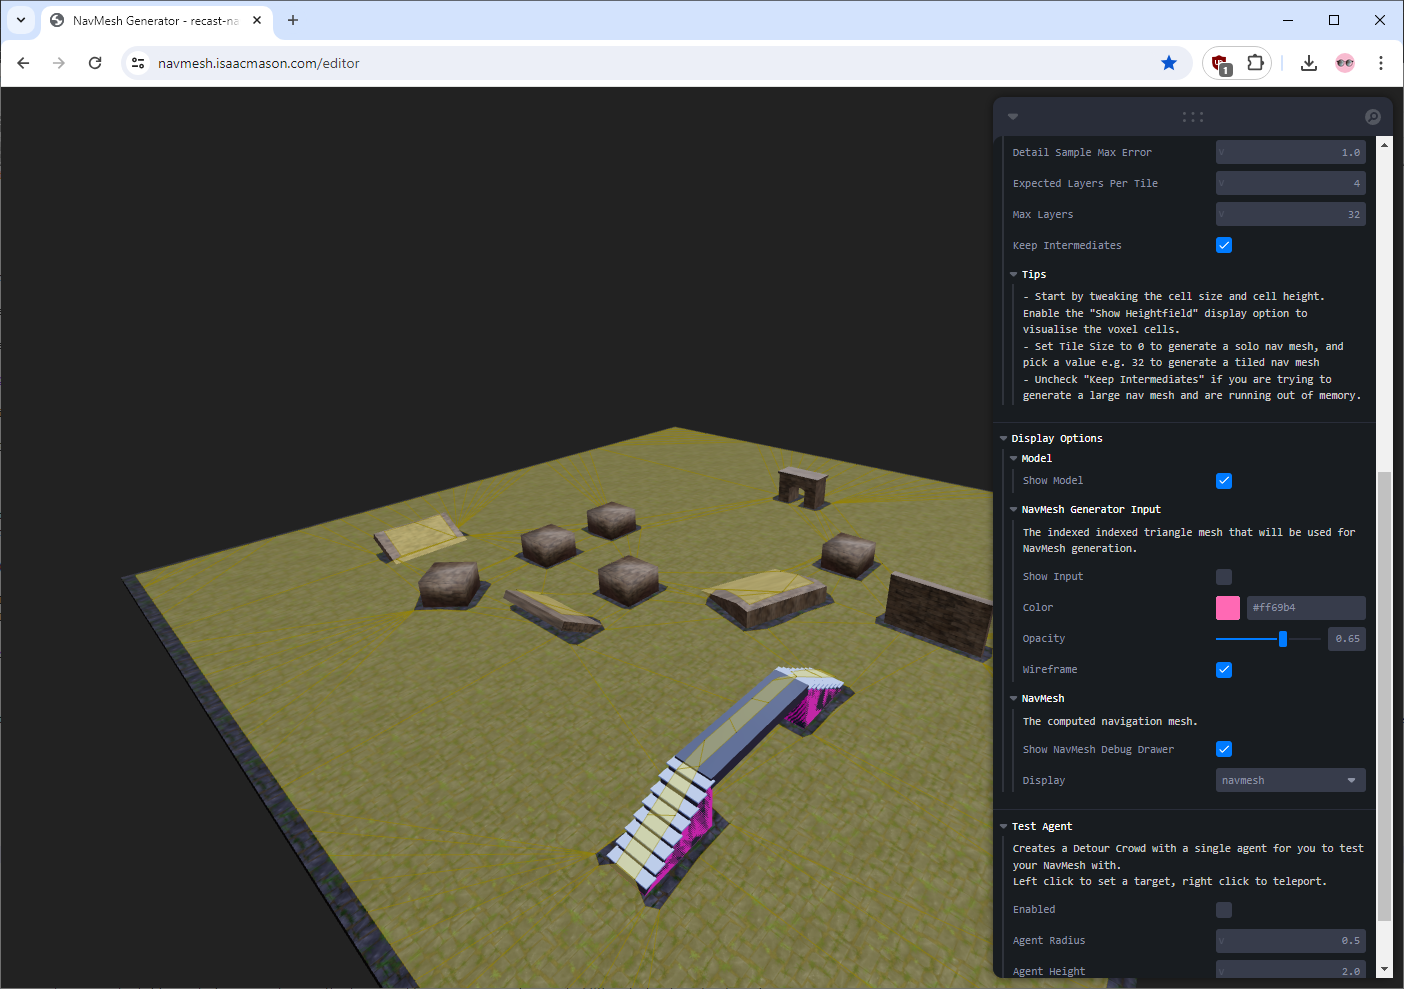
The only problem remaining is a little island that appears under the slope. We will remove that later.

Now you can use the “Export at GLTF” button to download the generated navmesh. Save it somewhere and then import it into the Blender file (File/Import/glTF 2.0). Rename the imported object from “Mesh-01” to “NAVMESH” because that is what our game will be looking for.
In Blender we have to get rid of that island under the slope. Hide all other objects (Select and press H). Select NAVMESH and go to Edit mode (Tab) and be sure to be in face mode (press 3). Select all faces belonging to islands (e.g. by pressing L to select the face under the mouse pointer) and delete them. It is very important that there are no unreachable islands in the navmesh.
Then export the static, dynamic objects and the nav mesh to the gltf file that will be loaded by the game (step21.gltf). This time use glTF separate format, especially if we are targeting a web version of the game.
No code changes are necessary, apart from pointing to the new input file in Settings.java:
static public final String GLTF_FILE = "models/step21.gltf";
This concludes step 21 where we discovered a new way to create a nav mesh.